


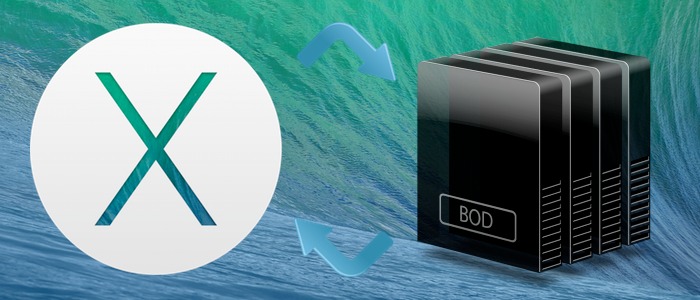
 RAID 0 is a method used to increase hard disk performance, by setting up multiple hard disks to work as a single virtual disk. For instance, if you set up a RAID 0 array to combine two 50 GB hard disks into a single 100GB virtual disk, that single virtual disk will have (roughly) two times faster performance than a normal disk.
Setting up a RAID system on a Hackintosh is very tricky, but it's definitely possible. For starters, there are two basic ways to set up a RAID system: with a hardware controller, or with a software controller. The hardware method offers better performance, but the software method is far more convenient. For this guide, we will show you how to set up a software RAID 0 system on Mac OS X in a Hackintosh.
LATEST UPDATE (March 7, 2014): The RAID 0 installation process for OS X Mavericks is exactly identical to the processes for Lion and Mountain Lion. I've updated the wording in this guide accordingly.
Overview

The last part of the process is the most important. When Mac OS X sets up a RAID 0 array, it creates a small "boot partition" for each of the hard disks inside the array. To be able to boot your computer from the RAID 0 array, you must install Hackintosh boot files onto all of these boot partitions. Since these boot partitions are system-protected by default, you can only modify them through Terminal. Fortunately, the process itself isn't too difficult.
NOTE 1: Though this guide refers to Chimera bootloader, it will also work for Chameleon bootloader, which is essentially the same thing.
NOTE 2: This guide is unnecessary if you install OS X Mountain Lion with iAtkos ML2. Unlike with Unibeast or similar tools, the iAtkos version of the Mountain Lion installer supports software RAID 0 arrays by default. Simply create an array by using the Disk Utility app inside the iAtkos installer (see Step 1 of this guide), and then install Mountain Lion straight onto there.
NOTE 3: RAID 0 arrays do not offer any file redundancy; if a single hard disk in your array fails, the entire array fails. So while a RAID 0 array doubles performance, it also doubles the failure rate. Be sure to consider these risks before reading on.
Requirements
- A working Hackintosh running Lion, Mountain Lion, or Mavericks: For the purposes of this guide, you need an already-working Hackintosh. Check out our installation guides section for more information.
- 2 extra hard disks: Unfortunately, because of the way RAID must be set up in Mac OS X Lion, Mountain Lion, and Mavericks, you cannot install Mac OS X directly onto a RAID 0 array. Instead, you must own two (or more) extra hard disks, in addition to the hard disk currently being used by your working Hackintosh. These hard disks will make up the RAID system itself.
Mac OS X cannot boot off a partition larger than 1 TB, so these hard disks cannot be larger than 1 TB. The disks don't necessarily have to be identical, but you'll get better and more reliable performance from identical ones. Be sure to connect these 2 hard disks to your computer's motherboard before beginning the process described in this guide. - Standalone installer for Chimera bootloader: Chimera is the bootloader that most Hackintoshes use to start Mac OS X. In this guide, you'll be writing several boot files, located inside the Chimera installer, onto the boot partitions of the hard disks in your RAID 0 array. Registration on tonymacx86.com is required to download Chimera.
- unpkg: This app extracts the contents of .pkg installer files. You'll need to use it to access the boot files inside Chimera bootloader.
- Carbon Copy Cloner / SuperDuper: These apps allow you to clone your Mac OS X installation onto a new hard drive (or in this case, a new RAID 0 array). Though both apps technically cost money, Carbon Copy Cloner has a 30-day free trial, and SuperDuper has a limited freeware version that lasts forever. Both of them work for the purposes of this guide.
Step 1: Create a RAID 0 array in Disk Utility
Boot into your existing installation of Mac OS X. Open Disk Utility (this app is located in Applications -> Utilities). On the left-hand column of Disk Utility, you should see the 2 extra hard disks that you're using for your RAID 0 array. Click on one of them, and then click the "RAID" tab. From here, name your RAID 0 array, and be sure to set your RAID type to "Striped RAID Set".


Step 2: Make Chimera bootloader recognize the array
Chimera does not see RAID arrays by default when your computer starts. To fix this, click on your new RAID 0 array in the left-hand column of Disk Utility, and click the "Info" button. You will see a field called "RAID Identifier". Copy this identifier.


rd=uuid boot-uuid=identifier
Replace "identifier" (don't include the quotation marks) with the actual identifier that you copied earlier. This will allow Chimera bootloader to see your RAID 0 array when your Hackintosh boots.

<key>UseKernelCache</key>
<string>Yes</string>
The kernel cache is a feature in Mac OS X that protects against system failures during bootup. For a RAID 0 array to work on Mac OS X, this feature needs to be turned on.

Step 3: Clone Mac OS X onto the array
Open Carbon Copy Cloner or SuperDuper (whichever you prefer). Select the hard drive that your Hackintosh is currently booting off as the "Source", and select the new RAID 0 array as the "Destination". On Carbon Copy Cloner, select the option "Delete anything that doesn't exist on the source" as well.

Step 4: Prepare boot files
Start unpkg, and drag the Chimera file that you downloaded onto the unpkg window. Unpkg will create a folder named "Chimera" inside the same folder where the unpkg app is located.


Step 5: Make your RAID 0 array bootable
To make your RAID 0 array bootable, you must install Chimera bootloader on the special boot partitions inside your array. However, since these boot partitions are hidden, you must install Chimera on them manually, through Terminal. Open Terminal (located in Applications -> Utilities). Enter the following:
diskutil list
This will output a list of all of your hard disks. Find the hard disks inside your RAID 0 array on this list.

Then, remember the identifiers of the "Boot OS X" partitions inside those hard disks (these are the special boot partitions I mentioned earlier). In the screenshot above, my partition identifiers are disk1s3 and disk2s3.
Once you've remembered the identifiers of your RAID 0 array, enter the following:
sudo su
Terminal will ask you for your system password. Type it in (no characters will show up on the screen-- this is normal). This will grant you superuser access, so that you can edit the system-protected boot partitions inside your RAID 0 array. Next, enter the following:
cd Desktop
This command changes the folder that Terminal is working on (cd stands for "change directory") to the desktop, where you put all of the Chimera boot files earlier. Then, type the following lines (enter each one separately):
fdisk -f boot0 -u -y /dev/DiskIdentifier1
fdisk -f boot0 -u -y /dev/DiskIdentifier2
dd if=boot1h of=/dev/PartitionIdentifier1
dd if=boot1h of=/dev/PartitionIdentifier2
Replace "DiskIdentifier1", "DiskIdentifier2", "PartitionIdentifier1", and "PartitionIdentifier2" (don't include quotation marks) with the identifiers that you remembered earlier. In the screenshot below, my disk identifiers are disk1 and disk2, and my partition identifiers are disk1s3 and disk2s3. These four commands will write the "boot0" and "boot1h" files from your desktop in Mac OS X onto the hard disks within the RAID 0 array.

diskutil mount PartitionIdentifier1
cp boot /Volumes/"Boot OS X"
cp -R Extra /Volumes/"Boot OS X"
diskutil unmount PartitionIdentifier1
diskutil mount PartitionIdentifier2
cp boot /Volumes/"Boot OS X"
cp -R Extra /Volumes/"Boot OS X"
diskutil unmount PartitionIdentifier2
Replace "PartitionIdentifier1" and "PartitionIdentifier2" (don't include quotation marks) with the first and second partition identifiers that you remembered earlier. These eight commands will mount the hard disks in your RAID 0 array, copy the "boot" file and "Extra" folder from your desktop onto the boot partitions of those hard disks, and unmount the hard disks.

Step 6: Success!
Reboot your Hackintosh. At your bootscreen, in addition to your previously existing hard disk, you should now see your RAID 0 array appear as an option. In my case, there are two separate icons-- selecting either icon should work.

- You'll probably want to change the hard disk priority in the BIOS of your motherboard so that one of your RAID hard disks has highest priority when your computer starts (either disk should work). Check out Step 4 of our Hackintosh dual-booting guide for more details.
- This is a software RAID setup, so you don't need to change your BIOS controller to RAID mode (keep it as AHCI).
- Since RAID 0 arrays have a much higher failure rate than normal hard disks, be sure to make weekly (or possibly daily) backups of your files. Check out our guide to backing up your Hackintosh for more details.
- After setting up a RAID 0 array, you will not be able to edit the contents of your "Extra" folder normally. Instead of relying on the "Extra" folder located in its normal location, Mac OS X will rely on the "Extra" folders on the boot partitions of the hard drives inside your array. These boot partitions are normally hidden.
- Turn on verbose boot to troubleshoot boot problems with your RAID 0 array. If verbose boot gives the error message "Can't find mach_kernel", check out coupz's solution on tonymacx86.