


In this guide, you will install Clover bootloader onto a USB drive. Then, you will boot your Hackintosh's installation of Mac OS X from this Clover USB drive. From there, you should be able to log into iMessage successfully. Once you've logged into iMessage, the fix is permanent; you won't have to boot using the Clover USB drive anymore.
UPDATE (February 19, 2013): This method is outdated. Installing the newest version of Chimera bootloader should now fix the problem.
Requirements
- A working Hackintosh: For this guide, we will assume that you already have a working Hackintosh. If you haven't installed Mac OS X on your PC yet, check out our guide to installing OS X Mountain Lion with Unibeast.
- An empty USB drive: You will install Clover bootloader onto this USB drive. Since Clover barely takes up 20 MB of space, this USB drive can be essentially any size. However, you will need to erase all of the files on the drive beforehand, so make sure to backup its contents first. You can reuse this USB drive for normal stuff afterwards.
- Clover Bootloader: Clover is an "EFI" bootloader for Mac OS X. Most Hackintoshes use either the Chimera or Chameleon bootloader to start Mac OS X. However, Clover adds a variety of extra features and fixes to the Mac OS X startup process that neither Chimera nor Chameleon can offer.
1. Set up your USB drive
Plug your USB drive into your computer. Open Disk Utility (located in Applications -> Utilities). Click on your USB drive in the left sidebar of the Disk Utility window, and go to the "Partition" tab.

In the partition tab, set your USB drive's partition layout to 1 partition. Then, set the format to MS-DOS (FAT). Click the "Options" button, and make sure that "Master Boot Record" is selected. Once everything looks right, click "Apply". This will erase and reformat your USB drive, giving it the necessary settings to make it bootable.
2. Install Clover on your USB drive
Download Clover bootloader. You will be installing this onto the USB drive that you just reformatted.
DOWNLOAD: Clover_v2_rL980.pkg
Double-click the downloaded .pkg file of Clover to start the installation. Choose your USB drive as the installation location.

Run the installer. In less than a minute, Clover bootloader will be successfully installed. Your USB drive is now bootable, though you'll still have to make a few adjustments to it in the next step.
3. Set up Clover
Open your USB drive in Finder by double-clicking the icon of the USB drive on the Mac OS X desktop.

If your Hackintosh is currently using a DSDT file (which is added when you install UserDSDT in Multibeast), go to EFI -> ACPI -> patched inside the USB drive. Then, open a second Finder window, go to the base of your main hard drive, and open the Extra folder. Inside that folder, you should see a file called "DSDT.aml". Drag this file into the patched folder in your USB drive.

Next, go back to the EFI folder at the base of your USB drive, and open the file config.plist in TextEdit (or any other text editor of your choice). In between </dict> and </dict> at the end of the file, add the following lines:
<key>RtVariables</key>
<dict>
<key>MLB</key>
<string>11111111111111111</string>
</dict>

These lines will tell Clover to inject a 17-character serial number ("MLB") into Mac OS X at startup. Hackintoshes don't have real serial numbers, so "11111111111111111" is there as a placeholder.
NOTE: Some guides tell you to enter a real serial number into config.plist. In my case, I found this step to be unnecessary, but your mileage may vary. If you want to add a real serial number (just in case), check out this alternate guide on InsanelyMac.
Finally, save the changes you've made to config.plist, and reboot your computer. Keep your USB drive plugged in.
4. Boot Mac OS X with Clover
If you haven't already, set USB drives to highest boot priority in the BIOS of your motherboard. Check out Step 4 of our Mountain Lion guide for details on how to do this.
Once that's settled, boot your computer normally. Your computer should boot from your Clover USB drive instead of booting from your normal hard disk. You will then see the Clover boot screen.

From the Clover boot screen, select the hard drive where you currently have OS X Mountain Lion installed. Press enter to start booting from that hard drive. If things go well, you will eventually reach the Mac OS X desktop.
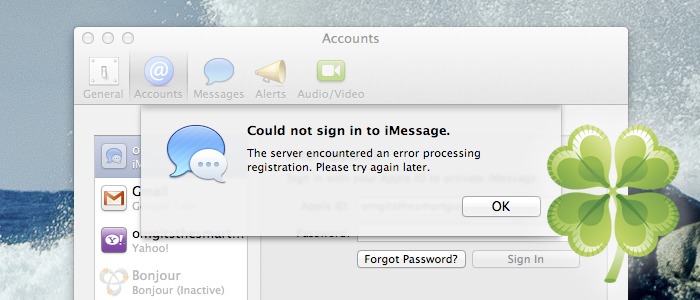
5. Log into iMessage
Once you have booted into Mac OS X with Clover, open the Messages app in Mac OS X, and log into your Apple account. The login process should now work.

Unplug your Clover USB drive, and restart your computer. Boot normally into Mac OS X. From now on, your Messages app will work properly, as long as you don't log out. Congratulations!
NOTE: When some people try to apply this fix, they receive an error message stating that their Apple ID "can't be used to set up iMessage at this time". There a couple of possible fixes for this issue. First, try logging out and logging back into your Apple ID (iCloud account) from a real Mac or iOS device. You can also try resetting your Apple ID password, or simply waiting and trying to login again later.