 Oftentimes, the DSDT section of tonymacx86 will only offer DSDT files for certain BIOS versions. If you checked your BIOS version, and you don't have a compatible version, then you'll have to update. This is known as flashing your BIOS, which sounds intimidating, but it's really not. In fact, flashing is as easy as installing most Windows programs, once you get used to the blue and yellow pages of the BIOS.
First, you need to download the BIOS update file for your specific BIOS version. If you haven't installed Windows on your Hackintosh yet, then you can do this from a separate computer (it needs to be a Windows PC, unfortunately).
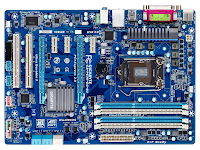
If you have a Gigabyte motherboard, simply Google the model name of your motherboard; the official Gigabyte page for your motherboard should be the first result. In the official Gigabyte page, click on the "Downloads" tab and select "BIOS" for download type. For example, this is the BIOS download page for my motherboard (a Gigabyte P67A-D3-B3). You'll download a .exe file. Run it; it will prompt your for installation location.
Just choose any random location that you can remember. The .exe file will extract two files: a BIOS updater (called FLASHSPI.EXE), and a BIOS update file (which should look something like "p67ad3b3.f5"). Ignore the updater; it's outdated and pretty much useless.
Put the file on a USB drive that has been formatted with the FAT or FAT32 file system. Then plug the drive into the computer whose BIOS you want to update. Boot into the BIOS (you need to press the Delete key at bootup to open the BIOS for Gigabyte motherboards). At the bottom of the BIOS screen, you will see something named along the lines of "Q-Flash Utility". This is a tool for updating BIOS software. On Gigabyte motherboards, press F8 to start Q-Flash. Q-Flash should detect the update file on your USB drive. Select that file and press the enter key. After a short update process, your BIOS will be updated.
Once the update process is done, you can reboot and begin your installation of Mac OS X, this time with a supported BIOS version.


