


Requirements:
- A compatible computer: Not every computer will work with Mac OS X, even with the help of tools like Unibeast and Multibeast. Be sure to read the Hackintosh compatibility guide very carefully, to check whether or not your computer qualifies. Mac OS X Lion has several new hardware requirements, compared to Snow Leopard. Lion is a 64-bit operating system, meaning that old 32-bit processors like Intel Pentium no longer work. Additionally, AMD processors do not work with Lion because there is no legacy kernel.
- Unibeast (Free): Unibeast is a Mac program that modifies the official Mac OS X Lion installer, and writes it onto a USB drive. You can then use this Unibeast USB drive to run the Mac OS X Lion installer on a PC. Unibeast works with Mac OS X Snow Leopard and newer; registration on tonymacx86.com is required to download Unibeast.
- A Hackintosh with Snow Leopard already installed, a real Mac, or a Mac OS X virtual machine: Unibeast is a Mac app, so you need a computer with Mac OS X to run it. You could use a real Mac, if you own one. Alternatively, you could install Mac OS X Snow Leopard on your PC, and then follow this guide to update your PC to Lion (if your computer uses an Ivy Bridge processor, be sure to use iBoot for Ivy Bridge). As one last option, you could install Snow Leopard on a virtual machine, and run Unibeast on there instead. Be sure to install the Virtualbox Extension Pack to view USB drives from your virtual machine.
- Mac OS X Lion ($30 or $70): The method used by this guide requires that you have a copy of the Lion installer app ($30) from the Mac App Store, or in the Lion USB Thumb Drive ($70) sold by Apple. The Mac App Store is available in Mac OS X version 10.6.6 or higher.
- An empty USB drive (8 GB or larger): The USB drive used for Unibeast must be at least 8 GB in size. Since Unibeast will erase all of the files on your USB drive, make sure to back up its contents first. You can reuse this USB drive for normal stuff after you finish installing Lion.
- Multibeast (Free): Multibeast is a collection of kext files that your Hackintosh will need to run properly, after the initial installation. Download it onto a USB drive. Be sure to download the newest version, not the older version 3 of Multibeast, which is for Snow Leopard.
1. Format your USB drive for Unibeast
Plug your USB drive into Mac OS X, and open Disk Utility (located in the Utilities folder in the Applications folder). Select the USB drive in the sidebar of Disk Utility, go to the "Partition" tab of Disk Utility, and create a new partition layout with 1 partition. Set the format to "Mac OS Extended (Journaled)". Name the new partition whatever you want.

2. Run Unibeast


3. Settings up the parts of your PC
I covered these steps in my Snow Leopard guide, but they're worth mentioning again: Open up your Hackintosh, and make sure that the SATA cables for your hard drive and your DVD/Bluray drive are plugged into the 3GB/s SATA ports on your motherboard, not the 6GB/s SATA ports (these should be labeled on the motherboard). On Gigabyte motherboards, the 3GB/s ports are blue while the 6 GB/s ports are white. The 6 GB/s SATA ports simply don't work well with OS X.
NOTE: If your computer is more than 2 years old, it probably won't have any 6GB/s SATA ports.
 |
| Source |
Also, unplug any extra internal hard drives that your computer has, besides the hard drive that you're installing OS X on. (Just unplug the hard drive SATA cables from your motherboard.)
4. Setting up your motherboard's BIOS
The BIOS is basically a settings page for your motherboard. To enter the BIOS on my own computer's Gigabyte GA-P67A-D3-B3 motherboard, I have to press the delete key when it boots (before the operating system starts). Different manufacturers set different keys for opening the BIOS.

On my Gigabyte GA-P67A-D3-B3 motherboard, I have to go to "Advanced BIOS Features" and set the first boot device to "USB-HDD". You should then set "Hard Disk" as second boot device. The specific layout of your motherboard's BIOS depends on its manufacturer and model.

After you finish installing Mac OS X Lion, you should change the first boot device back to "Hard Disk" (this optional, but it will speed up your boot times).
5. Boot into Unibeast
Restart your Hackintosh, and plug in your Unibeast USB drive. If things go well, your computer will boot from the USB drive instead of booting from your normal hard disk. You will then be able to view the Unibeast menu.

At the Unibeast menu, select the name of your Unibeast USB drive, by using the left/right arrow keys on your keyboard, and then press the enter key (or return key) to start the Mac OS X Lion installer.

To enter boot flags, manually restart your computer by pressing your computer's power button. Then, once you've booted back into the Unibeast menu, try typing any necessary boot flags before pressing the enter/return key. Check out this list of common boot flags for reference ( PCIRootUID=0 and -x are two popular boot flags).
6. Install Lion
Continue, and you will eventually come up to a page that asks you for a "destination" for your Mac install. Select the hard drive that you want to install Mac OS X Lion on, and continue. 
Mac OS X Lion will now install itself. This will take at least 20 minutes.
Restart. If your Hackintosh already had Mac OS X Snow Leopard installed beforehand, you can unplug the Unibeast USB drive. Otherwise, keep the USB drive plugged in. At the boot screen, you'll see an icon for the hard drive where you installed Lion. Select it (use the arrow keys on your computer) and press "Enter". Lion will boot, and you should eventually be led to the Mac OS X setup screen. Fill it out, then mission accomplished!
To enter boot flags, manually restart your computer by pressing your computer's power button. Then, once you've booted back into the Unibeast menu, try type any necessary boot flags before pressing the enter/return key. Check out this list of common boot flags for reference ( PCIRootUID=0 and -x are two popular boot flags).
7. Multibeast
Multibeast is a collection of kext files that you'll need to install for your Hackintoshes to have sound, internet, a high resolution screen, and more. Different Hackintosh builds require different Multibeast setups, though most setups are very similar. Find out what Multibeast options you need to install. If you have a Gigabyte GA-P67A-D3-B3 motherboard like me, check out my own Multibeast setup.
If you're just updating your Hackintosh from Mac OS X Snow Leopard, you don't have to reinstall UserDSDT, Easybeast, or Chimera in Multibeast after installing Lion. Mac OS X treats Lion as just another update-- this generally means that the only things you have to reinstall in Multibeast are kext files, such as the kexts for audio and ethernet. You might also have to reinstall miscellaneous kexts, such as TRIM Enabler (for SSDs).

Once that's done with, you should be running a fully functional copy of Mac OS X Lion on your PC. Congratulations!
8. Updates [OPTIONAL]
When you first install Mac OS X Lion, it will already be on the newest version. You can check what version you have by clicking on the Apple icon on the upper left-hand corner of Mac OS X, and clicking "About This Mac". Of course, Apple will always push out new software updates in the future, so you need to be prepared for these updates.
It's pretty easy to update a Hackintosh-- all you need to do is download the combo update for the newest version of Mac OS X Lion, and install it. Apple does not directly link to the combo updates on its support site, but you can easily find these combo updates through Google. For instance, if you're looking for the combo update for Mac OS X 10.7.3, simply Google "10.7.3 combo update" (without the quotation marks). The official Apple page will be the first result.
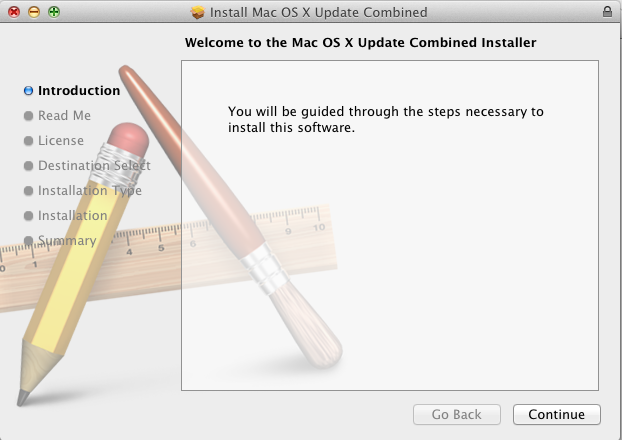
When the combo update finishes installing, don't reboot. Generally, system updates break the audio on Hackintoshes, so you need to open Multibeast and reinstall any audio kexts that your Hackintoshes uses. After that, you're pretty much done. Reboot, and your Hackintosh will be updated.
It's pretty easy to update a Hackintosh-- all you need to do is download the combo update for the newest version of Mac OS X Lion, and install it. Apple does not directly link to the combo updates on its support site, but you can easily find these combo updates through Google. For instance, if you're looking for the combo update for Mac OS X 10.7.3, simply Google "10.7.3 combo update" (without the quotation marks). The official Apple page will be the first result.
When the combo update finishes installing, don't reboot. Generally, system updates break the audio on Hackintoshes, so you need to open Multibeast and reinstall any audio kexts that your Hackintoshes uses. After that, you're pretty much done. Reboot, and your Hackintosh will be updated.