


NOTE: This guide is essentially a combination of my guides on installing Mac OS X Snow Leopard, installing Mac OS X Lion, and installing Lion in a virtual machine. The process of installing a distro is very similar to the standard methods of installing Mac OS X.
Requirements:
- A compatible computer: Not every computer will work with Mac OS X, even with modified versions of OS X. Be sure to read the Hackintosh compatibility guide very carefully, to check whether or not your computer qualifies. Mac OS X Lion has several new hardware requirements, compared to Snow Leopard. For instance, Lion is a 64-bit operating system, meaning that old 32-bit processors like Intel Pentium no longer work. Additionally, AMD processors do no work with Lion because there is no legacy kernel.
- iAtkos L2: This is a popular distro of Mac OS X Lion. I won't go into details, but you can download it from just about any bittorrent website by using a bittorrent client (it's about 4 GB in size). The standard method for installing Mac OS X Lion requires you to modify a retail copy of Mac OS X Lion with Unibeast, but iAtkos already does all of this for you. You will need to burn iAtkos onto a DVD, and boot your computer from that DVD to install Mac OS X. To burn DVDs, you need an empty DVD disc and a DVD/Bluray burner (just about every DVD/Bluray drive nowadays can act as a burner, too).
- Multibeast Lion Edition (Free): Multibeast is a collection of kext files that your Hackintosh will need to run properly, after the initial installation. Download it onto a USB drive, along with the combo update. You need to register an account on tonymacx86.com to download Multibeast. Be sure to download the Lion edition, not the Snow Leopard edition.
- A DSDT file for your motherboard (Free): DSDT files are configuration files that customize Mac OS X to work with your specific motherboard. If your motherboard has a DSDT file available in the DSDT section of tonymacx86.com, download it onto a USB drive along with the Combo Update and Multibeast. Make sure that your motherboard has the right BIOS version, or the DSDT file won't work. For example, a DSDT file for version F4 won't work if your motherboard has version F1.
You can check your motherboard's BIOS version straight from the BIOS itself, or you can check with CPU-Z (if you already have Windows installed). Read this to learn how to update your BIOS version.
1. Settings up the parts of your computer
Open up your Hackintosh, and make sure that the SATA cables for your hard drive and your DVD/Bluray drive are plugged into the 3GB/s SATA ports on your motherboard, not the 6GB/s SATA ports (these should be labeled on the motherboard). On Gigabyte motherboards, the 3GB/s ports are blue while the 6 GB/s ports are white. The 6 GB/s SATA ports simply don't work well with OS X.
NOTE: If your computer is more than 2 years old, it probably won't have any 6GB/s SATA ports.
 |
| Source |
Also, unplug any extra internal hard drives that your computer has, besides the hard drive that you're installing OS X on. (Just unplug the hard drive SATA cables from your motherboard.)
P.S. If you already have Windows installed on another internal hard drive in your computer, you will have to enable AHCI for Windows before installing Mac OS X. Otherwise, Windows won't boot afterwards. Also, after installing Mac OS X, you should also sync your clock on Windows with Mac OS X.
2. Setting up your motherboard's BIOS
The BIOS is basically a settings page for your motherboard. To enter the BIOS on my own computer's Gigabyte P67A-D3-B3 motherboard, I have to press the delete key when it boots (before the operating system starts). Different manufacturers set different keys for opening the BIOS.

Boot Device - Change the boot device of your computer so that "CDROM" is first. You need to do this for the iAtkos DVD to work.


3. Burn iAtkos onto a DVD disc
Burn iAtkos onto a DVD disc. You will be booting your Hackintosh from this iAtkos DVD, in order to install Mac OS X Lion.
On Windows 7, burning capabilities are built-in to the operating system-- just insert an empty DVD into your DVD/Bluray drive, right-click on the downloaded iAtkos file (it should either be an ISO file), and burn it. If you're using Windows XP or Vista, you will need to use a program such as ImgBurn.

4. Boot into iAtkos
Insert the iAtkos DVD into the DVD drive of your PC, and reboot your PC. If things go well, your computer will boot into the iAtkos boot screen.
 If you do not manage to reach the iAtkos boot screen, check your motherboard's BIOS settings to make sure that the changes you made in Step 2 were properly applied. If they were, try burning iAtkos onto a different DVD (if you used the built-in Windows 7 burning tool to burn the DVD the first time, try using ImgBurn instead).
Normally, after you continue past the iAtkos boot screen, the installation screen will be loaded within a few minutes (5-10 minutes for me).
 In the worst case scenarios, instead of loading the Mac OS X installer, you may end up at a dark gray screen that tells you to restart your computer (a kernel panic), or you may end up with a small crossed-out sign (a loading error). If you get a kernel panic/loading error (or if the Mac OS X installer simply won't start within 30 minutes), you'll need to enter some boot flags.
 To enter boot flags, manually restart your computer by pressing your computer's power button. Then, once you've booted back into the iAtkos menu, try typing any necessary boot flags before pressing the enter/return key. Check out this list of common boot flags for reference ( PCIRootUID=0 and -x are two popular boot flags).
5. Install Lion
Once you've entered the Mac OS X Lion installer, you will come up to a page that asks you for a "destination" for your Mac install. Oh no, the page is blank! We'll have to fix that. To do this, start up Disk Utility (located under the Utilities menu in the top bar).
You need to use Disk Utility to erase a hard drive partition so that OS X Mountain Lion can install itself on it. In the sidebar of Disk Utility, choose the hard drive partition where you want Mountain Lion installed, and erase it by using the "Erase" tab. You can also just erase the entire hard drive (this is the preferred solution if you don't plan to dual-boot Windows and Mac OS X from the same hard drive).
When erasing, the format should be set to "Mac OS Extended (Journaled)". You can also partition the hard disk by using Disk Utility's Partition tab.
 NOTES:
On the installation page for Mac OSX, the hard disk/disk partition should now be showing up.
 Select it, and then click the "Customize" button on the bottom left. This is where using a distro becomes really useful: iAtkos allows you to install extra Hackintosh drivers and kexts, straight from the Mac OS X Lion installer. The "Customize" page essentially does the same thing as Multibeast, though the layout (and some of the names of the options) are different.
 However, choosing the right options from this page can be really tricky, so unless you're absolutely certain about which drivers and kexts you need to install for your computer, I don't recommend installing too much stuff from here. For most computers, the default selection should be enough. You can figure out the rest in Step 6, where you'll actually set up your Hackintosh with Multibeast.
The only extra option that you'll probably have to choose from the Customize page is "IOPCIFamily" (located under "Patches"). This fixes a common boot issue with Lion; it's installed by default in iAtkos L2, but you'll have to choose it yourself in iAtkos L1.
Once that's done with, install Mac OS X Lion. This will take at least 20 minutes.
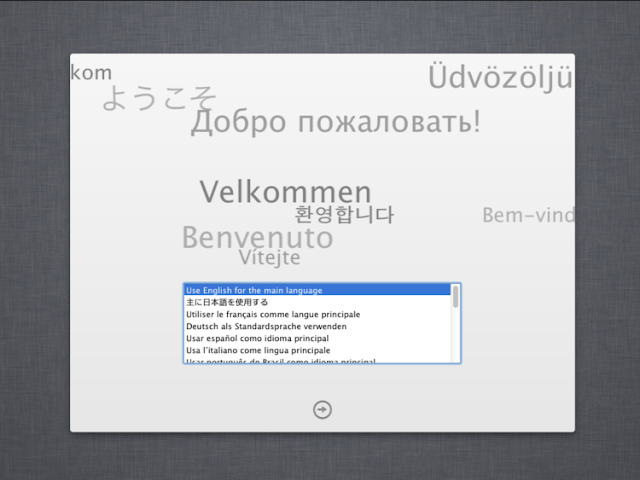
 Restart (you can eject your iAtkos DVD). At the boot screen, you'll see an icon for the hard drive where you installed Lion. Select it (use the arrow keys on your computer) and press "Enter". Lion will boot, and you should eventually be led to the Mac OS X setup screen. Fill it out, then mission accomplished!
 If you get a kernel panic/loading error when you try to boot your new Lion installation (or if the installation simply won't start within 5 minutes), reinsert your iAtkos DVD into the DVD drive, and restart your computer. The iAtkos boot screen will come up again. From the iAtkos boot screen, select the hard drive where you installed Lion, and press "Enter".
Once again, if your Mac OS X won't even boot with the help of your iAtkos DVD, you'll need to enter some boot flags. To enter boot flags, manually restart your computer by pressing your computer's power button. Then, once you've booted back into the iAtkos menu, try type any necessary boot flags before pressing the enter/return key. Remember to check out this list of common boot flags for reference.
6. Post-Installation: Multibeast
Multibeast is a collection of kext files that you'll need to install for your Hackintoshes to have sound, internet, a high resolution screen, and more. Different Hackintosh builds require different Multibeast setups, though most setups are very similar. Find out what Multibeast options you need to install. If you have a Gigabyte GA-P67A-D3-B3 motherboard like me, check out my own Multibeast setup.
You probably won't have internet on your Hackintosh yet, so use another computer to download Multibeast and copy it onto the USB drive. Then plug the drive into your Hackintosh.
 If you have a DSDT file for your motherboard, rename it "DSDT.aml", copy it onto the desktop of Mac OS X, and run "UserDSDT Install" in Multibeast.
Finding the right options for Multibeast may take some trial and error. Your best chance at finding the right setup is to Google your specific motherboard or computer model. For example, if your computer has a GA-P67A-D3-B3 motherboard like mine, Google "GA-P67A-D3-B3 hackintosh". If you're lucky, somebody will have written a guide on installing OS X for your computer, and you can just copy their Multibeast setup.
Enabling your graphics card so that it'll run at full resolution can be even trickier. Some graphics cards work out of the box, without any modifications necessary, while other graphics cards (especially newer ones) can be a huge pain. If you happen to own a Galaxy GTX 460, you can enable it with a combination of the official NVIDIA drivers, NVEnabler, and 32-bit Apple Boot Screen.
And that's all there is to it. If your PC is built of nothing but Hackintosh-compatible parts (known as "vanilla"), this entire process might only take around 3-4 hours. Of course, for most of us, this process will take much longer. Good luck Hackintoshing!
Insert the iAtkos DVD into the DVD drive of your PC, and reboot your PC. If things go well, your computer will boot into the iAtkos boot screen.

Normally, after you continue past the iAtkos boot screen, the installation screen will be loaded within a few minutes (5-10 minutes for me).


5. Install Lion
You need to use Disk Utility to erase a hard drive partition so that OS X Mountain Lion can install itself on it. In the sidebar of Disk Utility, choose the hard drive partition where you want Mountain Lion installed, and erase it by using the "Erase" tab. You can also just erase the entire hard drive (this is the preferred solution if you don't plan to dual-boot Windows and Mac OS X from the same hard drive).
When erasing, the format should be set to "Mac OS Extended (Journaled)". You can also partition the hard disk by using Disk Utility's Partition tab.

- Mac OS X cannot boot from a partition that's larger than 1 TB in size, so if you have a 2 TB hard drive, you will have to partition it.
- Unlike the default Mac OS X Lion installer, the iAtkos version of the Lion installer works with MBR partitions by default. If your hard disk uses the MBR partition scheme, iAtkos will install itself onto there without the need for prior modifications.
- The iAtkos version of the Lion installer also works with software RAID 0 arrays by default. If you want to set up your Hackintosh's hard disks in a RAID 0 array, simply create an array by using the Disk Utility app inside the iAtkos installer (see Step 1 of our RAID 0 guide). iAtkos will install itself onto there without the need for Steps 2-5 of our RAID 0 guide.
On the installation page for Mac OSX, the hard disk/disk partition should now be showing up.


The only extra option that you'll probably have to choose from the Customize page is "IOPCIFamily" (located under "Patches"). This fixes a common boot issue with Lion; it's installed by default in iAtkos L2, but you'll have to choose it yourself in iAtkos L1.
Once that's done with, install Mac OS X Lion. This will take at least 20 minutes.


Once again, if your Mac OS X won't even boot with the help of your iAtkos DVD, you'll need to enter some boot flags. To enter boot flags, manually restart your computer by pressing your computer's power button. Then, once you've booted back into the iAtkos menu, try type any necessary boot flags before pressing the enter/return key. Remember to check out this list of common boot flags for reference.
6. Post-Installation: Multibeast
Multibeast is a collection of kext files that you'll need to install for your Hackintoshes to have sound, internet, a high resolution screen, and more. Different Hackintosh builds require different Multibeast setups, though most setups are very similar. Find out what Multibeast options you need to install. If you have a Gigabyte GA-P67A-D3-B3 motherboard like me, check out my own Multibeast setup.
You probably won't have internet on your Hackintosh yet, so use another computer to download Multibeast and copy it onto the USB drive. Then plug the drive into your Hackintosh.
Finding the right options for Multibeast may take some trial and error. Your best chance at finding the right setup is to Google your specific motherboard or computer model. For example, if your computer has a GA-P67A-D3-B3 motherboard like mine, Google "GA-P67A-D3-B3 hackintosh". If you're lucky, somebody will have written a guide on installing OS X for your computer, and you can just copy their Multibeast setup.
Enabling your graphics card so that it'll run at full resolution can be even trickier. Some graphics cards work out of the box, without any modifications necessary, while other graphics cards (especially newer ones) can be a huge pain. If you happen to own a Galaxy GTX 460, you can enable it with a combination of the official NVIDIA drivers, NVEnabler, and 32-bit Apple Boot Screen.
And that's all there is to it. If your PC is built of nothing but Hackintosh-compatible parts (known as "vanilla"), this entire process might only take around 3-4 hours. Of course, for most of us, this process will take much longer. Good luck Hackintoshing!